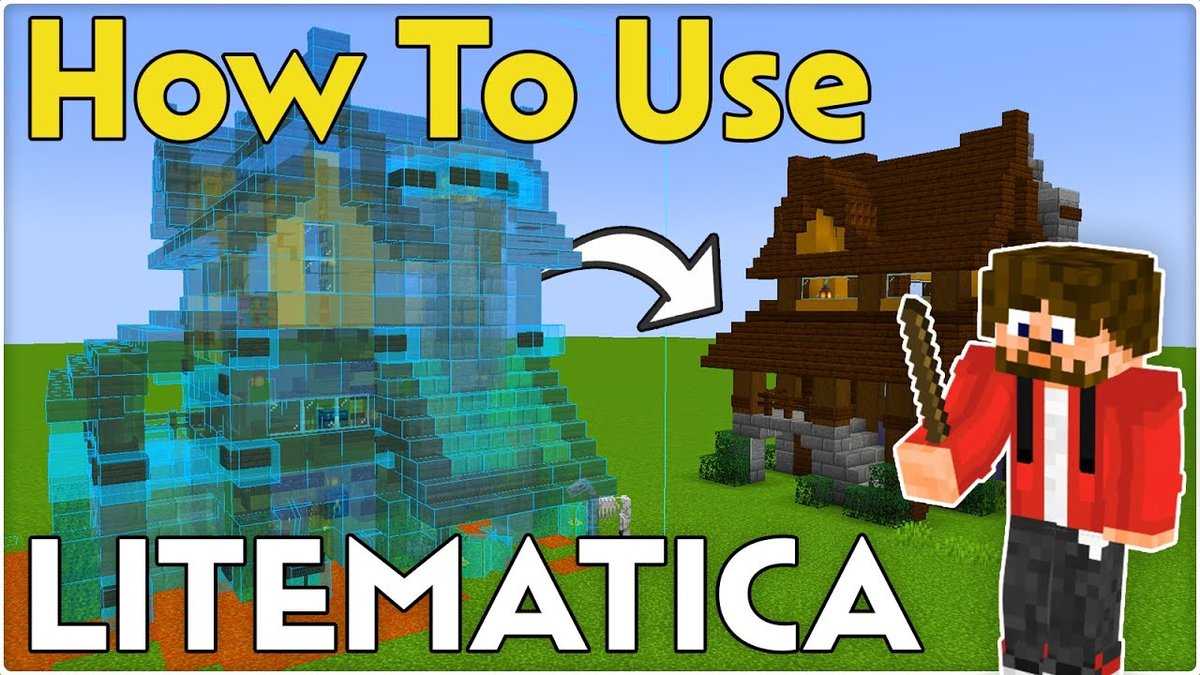
Minecraft building is an art, a science, and often, a test of patience. From grand castles to intricate Redstone contraptions, bringing your vision to life block by block can be incredibly time-consuming and error-prone. That's where Litematica steps in, transforming complex construction into a streamlined, efficient, and genuinely enjoyable process. Mastering its features, especially adhering to the Best Practices for Efficient Litematica Use, isn't just about saving time; it's about unlocking a new level of creative freedom and precision in your Minecraft world.
At a Glance: Your Litematica Efficiency Checklist
- Install Dependencies First: Always ensure MaLiLib is installed alongside Litematica.
- Master the M-Menu: Get familiar with the main interface for core functions.
- Customize Hotkeys Early: Assign shortcuts for frequently used actions to save countless clicks.
- Perfect Your Area Selection: Accurately define regions for saving and editing.
- Leverage Holograms: Use them for precise placement, rotation, and planning.
- Analyze Materials: Generate lists to prepare resources efficiently before you build.
- Manage Schematics Wisely: Keep your
schematicsfolder organized. - Learn Visibility Controls: Toggle layers and overlays to prevent visual clutter.
Getting Started: Laying the Foundation for Efficiency
Before you can build your digital empires, you need the right tools. Litematica isn't just a mod; it's an indispensable companion for serious builders. Its power lies in its ability to create, save, and overlay building blueprints (schematics) directly in your game, making planning, replicating, and even mass-producing structures significantly simpler. It's a game-changer for both survival resource management and creative design exploration.
Seamless Installation: Your First Step to Smarter Building
Installing Litematica doesn't have to be daunting. The key is understanding its dependency: MaLiLib. Think of MaLiLib as Litematica's operating system; it needs to be present for the mod to function.
The Easy Route (Modpack Apps):
If you're using a modpack launcher like Curseforge or Modrinth, simply search for "Litematica" and install it. These apps are smart enough to automatically fetch and install MaLiLib for you, ensuring a smooth setup. This is the recommended path for most users, as it significantly reduces potential errors.
The Manual Path (Vanilla Launcher):
For those who prefer a hands-on approach with the vanilla Minecraft launcher, follow these steps precisely:
- Open Game Directory: Launch Minecraft, navigate to the "Installations" tab, and click the folder icon next to your desired Minecraft version. This opens your game's root directory.
- Locate
modsFolder: Inside this directory, you should find a folder namedmods. If it's not there, simply create one. - Place Mod Files: Download both the Litematica mod file (e.g.,
litematica-fabric-1.20.1-0.1.0.jar) and the corresponding MaLiLib mod file (e.g.,malilib-fabric-1.20.1-0.16.0.jar) from trusted sources like CurseForge or Modrinth. Move both of these.jarfiles into yourmodsfolder. - Launch Minecraft: Close and relaunch your Minecraft client. If installed correctly, you'll see Litematica's presence, often indicated by a message on the title screen or in the mod list.
Best Practice: Always download Litematica and MaLiLib versions that match your specific Minecraft client version (e.g., both for Minecraft 1.20.1). Mismatched versions are the most common cause of installation issues.
The Litematica M-Menu: Your Command Center
Once in-game, your journey into efficient building truly begins with the M key. Pressing M opens Litematica's main configuration menu, a centralized hub for all its powerful features. Don't be overwhelmed by the options; we'll break down the essentials.
Here's a quick tour of what you'll find:
- Schematic Placements: This is where you manage schematics that are currently visible as holograms in your world. Move them, rotate them, or make them invisible.
- Loaded Schematics: Shows schematics currently loaded into memory. You can modify their properties or unload them when you're done.
- Load Schematics: Your gateway to accessing all saved schematic files on your computer or those you've created in-game.
- Area Editor: Provides detailed information and editing options for your currently selected area, like naming, resizing, and saving.
- Area Selection Browser: A list of all your saved selections. You can create new ones or re-open existing ones from here.
- Area Selection Mode: Defines how you make selections. "Simple" is for single cuboid regions, while "Normal" allows for more complex, multi-part selections.
- Configuration Menu (M + C): Dive deep here to customize everything from visual appearance (colors, opacity) to crucial hotkey assignments.
- Schematic Manager: Organize, rename, or permanently delete your schematic files.
- Tasks Manager: Keeps track of automated processes, like material analyses that have completed.
- Tool Mode: A small indicator, usually in the bottom left, showing what your currently active tool (often a stick) is set to do (e.g., Fill, Delete, Area Selection).
Best Practice: The very first thing you should do after opening theMmenu is to navigate to the Configuration Menu (M + C) and then to the Hotkeys section. Many essential Litematica functions are unassigned by default. Take the time to set up intuitive keybinds that work for you. This is arguably the most impactful step for true efficiency, allowing you to fluidly interact with schematics without constantly diving into menus.
Precision Selection: Defining Your Blueprint
Before you can save a schematic or analyze materials, you need to define the area you're interested in. Litematica makes this simple and highly precise.
Making Your First Selection
- Get a Stick: Ensure you have a simple stick in your main hand. This is Litematica's default tool for area selection (and many other functions).
- Define Corners:
- First Corner: Point your crosshair at the block that will be one corner of your cuboid selection and right-click. You'll see a visual indicator (often a glowing outline) marking this point.
- Second Corner: Move to the diagonally opposite block that will define the other corner of your desired area and left-click.
- Visual Confirmation: Litematica will immediately render a transparent box outlining your selection.
Refining and Managing Your Selection
Once you've made a selection, press M and navigate to the Area Editor. Here, you have powerful options:
- Naming: Give your selection a descriptive name. This is crucial for organization when you have many areas saved.
- Coordinates (XYZ): View and precisely adjust the X, Y, and Z coordinates of both corners. This is incredibly useful for exact alignments.
- Moving Corners: If your initial clicks were slightly off, you don't need to re-select from scratch. You can manually tweak the coordinates or use hotkeys (if assigned) to shift the selection box.
- Analyzing Materials: This is a survival builder's best friend. With your area selected, the Area Editor provides an option to "Analyze Area to Schematic." This generates a detailed list of every block type and quantity needed to build the structure within your selection.
Best Practice: Before saving any schematic, always perform a material analysis. Even if you're in creative mode, it helps you understand the complexity and resource demands of your build. For survival players, this list is invaluable for gathering resources before you even place the first block.
Editing and Planning: The Art of the Hologram
Litematica truly shines in its ability to let you visualize and manipulate your designs as transparent holograms before committing to actual blocks. This functionality is key to iterative design and error prevention.
Your Design, in Holographic Form
Once you've selected an area and saved it as a schematic (more on saving next), you can load it as a holographic preview. This ghost image acts as a guide, showing you exactly where each block should go.
- Rotation and Flipping: Using dedicated hotkeys (which you should set!), you can rotate your schematic (90, 180, 270 degrees) or flip it along any axis (X, Y, or Z). This is incredibly powerful for mirroring designs or adapting them to different orientations without rebuilding them.
- Block Replacement: In certain tool modes, you can even specify block transformations directly within the schematic preview, though this is an advanced feature primarily for specific build tasks.
Mastering Tool Modes for Dynamic Changes
Litematica's Tool Mode (visible in the bottom left of your screen when the M menu is open, or assign a hotkey to cycle through them) dictates what your stick (or other assigned tool) does.
- Area Selection Mode: As discussed, for defining regions.
- Move Mode: Select your schematic placement, then switch to "Move" mode. Now, you can point your stick and use left/right-click to move the entire schematic hologram, either block by block or by larger increments, allowing for precise positioning.
- Fill Mode: For specialized tasks like filling a selected area with a specific block.
- Delete Mode: To remove selected blocks or areas.
Best Practice: When planning, always load your schematic as a hologram first. Walk around it, fly through it, make sure it fits your intended location and aesthetic perfectly before you start placing blocks. This virtual sandbox approach eliminates costly real-world mistakes.
Loading and Using Schematics: Bringing Blueprints to Life
The core function of Litematica is taking a schematic file and projecting it into your world. This is where your planning transforms into tangible building guidance.
How Schematics Enter Your Game
Schematics come into Litematica in two primary ways:
- Pre-Made Files (
.schematic):
- Many builders share their creations online as
.schematicfiles. You can download these from websites like Planet Minecraft or various community forums. - Once downloaded, you need to place these files into Litematica's designated
schematicsfolder. This folder is typically found within your Minecraft instance folder (the same directory where yourmodsfolder is located). If it doesn't exist, create it. - After placing the file, go into Minecraft, press
M, select "Load Schematics," and you should see your newly added schematic in the list.
- Creating In-Game:
- First, use the Area Selection Tool (your stick!) to define the region you want to save.
- Press
Mto open the main menu. - Go to the Area Editor.
- You'll see an option like "Save Schematic" or "Save Selected Area as Schematic." Click this, give your schematic a meaningful name, and save it. It will automatically appear in your
schematicsfolder for future use.
Placing Your Blueprint
Once a schematic is loaded (from the "Load Schematics" menu), you need to create a "placement" to see it in your world.
- Automatic Placement: When loading a schematic, check the "Create a Placement" box. This will automatically place the schematic hologram at your current location, oriented to your current facing direction.
- Manual Placement: If you want more control, or you're placing multiple instances, keep the "Create a Placement" box unchecked. Instead, switch your tool mode to "Schematic Placement" (assign a hotkey for this!). Then, use your mouse to click where you want the hologram to appear. You can then use the "Schematic Placements" menu (
M> Schematic Placements) to fine-tune its position, rotation, and mirror settings.
Best Practice: When placing complex schematics, especially those downloaded from others, check theMmenu, thenLoaded Schematics, and select the loaded schematic. Look for "Sub-region Mode" and ensure it's set to "All." This ensures all parts of a multi-part schematic are rendered. If you're encountering issues getting your schematic to appear correctly, or if you want to understand the deeper mechanics of How to Paste Schematics in Litematica, exploring these settings is often the key.
Maintaining Clarity: Managing Schematics and Overlays
Litematica can quickly clutter your screen with outlines and holograms if not managed properly. Efficient use means knowing how to show only what you need, when you need it.
Removing Schematics and Outlines
- Unloading from World (Hologram): To remove a schematic hologram from your view (but keep it loaded in memory for quick re-placement), go to
M> Schematic Placements. Select the placement you want to hide or remove and choose the appropriate option (e.g., "Toggle Render" or "Remove"). - Unloading from Memory: If you're completely done with a schematic for now and want to free up some memory, go to
M> Loaded Schematics. Select the schematic and click "Unload." - Permanently Deleting the File: To remove a schematic file from your computer (and Litematica's list), go to
M> Schematic Manager. Find the schematic in the list, select it, and choose "Delete File." Be careful with this, as it's permanent!
Adjusting Visibility for Optimal Focus
Sometimes you only want to see certain parts of a schematic, or you need to hide it entirely.
- Layer Visibility:
- Pressing Page Up (or your assigned hotkey) will reveal higher layers of your schematic, one Y-level at a time.
- Pressing Page Down (or your assigned hotkey) will remove layers, revealing lower Y-levels.
- This is incredibly useful for building layer by layer, especially for intricate roofs or multi-floor structures.
- Toggle All Render Layers (M + G): This hotkey (if assigned, default
M+G) quickly toggles the rendering of all active schematic placements on or off. Perfect for when you need a clear view of your world without any overlays. - Remove Overlays Completely (M + R): This hotkey (if assigned, default
M+R) is a more aggressive toggle, often removing selection boxes and other Litematica visuals as well. Use it for a completely clean view.
Best Practice: Customize your visibility hotkeys (M+C> Hotkeys) to easily toggle layers, placements, and outlines. Being able to quickly show/hide parts of your schematic without menu diving is crucial for maintaining focus and preventing visual overload during complex builds.
Advanced Tips for Peak Efficiency
Beyond the core functions, several practices can elevate your Litematica game from good to expert.
Utilize Multi-Part Selections
While "Simple" area selection creates a single cuboid, "Normal" mode (accessible via M > Area Selection Mode) allows you to define multiple, non-contiguous selection boxes. This is powerful for:
- Complex Structures: Saving a building with an integrated basement and rooftop garden as one schematic, even if the areas are vertically separated by empty space.
- Extracting Specific Elements: Selecting only the interesting parts of a larger structure without including unwanted surrounding blocks.
Leverage the "Swap Blocks" Feature
Found within the Schematic Placements menu, the "Swap Blocks" feature allows you to replace specific block types within the schematic itself without re-saving. For instance, if your schematic uses dirt as a placeholder for grass, you can tell Litematica to render all dirt blocks as grass blocks in the hologram. This is fantastic for material experimentation.
Work with "Placement Mirrors"
When placing a schematic, you can apply mirror and rotation transformations. However, if you need to build multiple identical structures across a large area, consider using "placement mirrors." These allow you to define a central point and then mirror or rotate placements around it, reducing manual alignment for repetitive builds like villages or city blocks.
Practice, Practice, Practice
Like any powerful tool, Litematica has a learning curve. Don't expect to master it overnight. Start with simple builds, experiment with hotkeys, and gradually tackle more complex projects. The more you use it, the more intuitive it becomes, and the faster you'll integrate it into your building workflow.
Common Pitfalls and How to Avoid Them
Even with the best intentions, users sometimes run into issues. Here are some common Litematica frustrations and how to prevent them:
- "My mod isn't loading!": Did you install MaLiLib? Is it the correct version for your Minecraft? Litematica will not work without MaLiLib.
- "I can't do anything with my stick!": Have you assigned hotkeys? Is Litematica's main menu (
M) accessible? If theMmenu doesn't open, the mod isn't loading correctly. - "My schematic is there, but I can't see it!":
- Is it loaded into "Schematic Placements" and enabled for rendering?
- Are your visibility layers (Page Up/Down, M+G) set correctly?
- Is the schematic perhaps incredibly far away from you? Check its coordinates in "Schematic Placements."
- "I saved my schematic, but it's empty/wrong size!": Did you correctly define your Area Selection (two opposite corners) before saving? Always visually confirm your selection box.
- "Litematica is causing lag!": For very large schematics, especially in busy multiplayer environments, rendering the hologram can be taxing. Try adjusting the "Render Range" in the Configuration Menu or temporarily toggling off schematic rendering (
M+G).
Elevate Your Builds: The Path to Minecraft Mastery
Litematica is more than just a mod; it's a paradigm shift for serious Minecraft builders. By internalizing these Best Practices for Efficient Litematica Use, you're not just learning a tool; you're adopting a mindset of precision, planning, and productivity. No more guessing block counts, no more misaligned walls, no more wasted hours fixing mistakes.
Your journey to mastering Minecraft building through Litematica begins now. Experiment, customize, and build something extraordinary. The only limit is your imagination, and Litematica is here to help you bring every pixel of it to life.